As excavators get older the constant use means that regularly wearing parts such as the
pins and bushings start to wear out. These are replaceable wearing parts and the following article gives some advice around some of the challenges around replacing them.
How to replace
excavator bucket pins
The bucket pins on a excavator are used to hold the bucket to the excvator. For this reason we put together a seperate resource which can be found here: How to change the bucket pins for ecavator
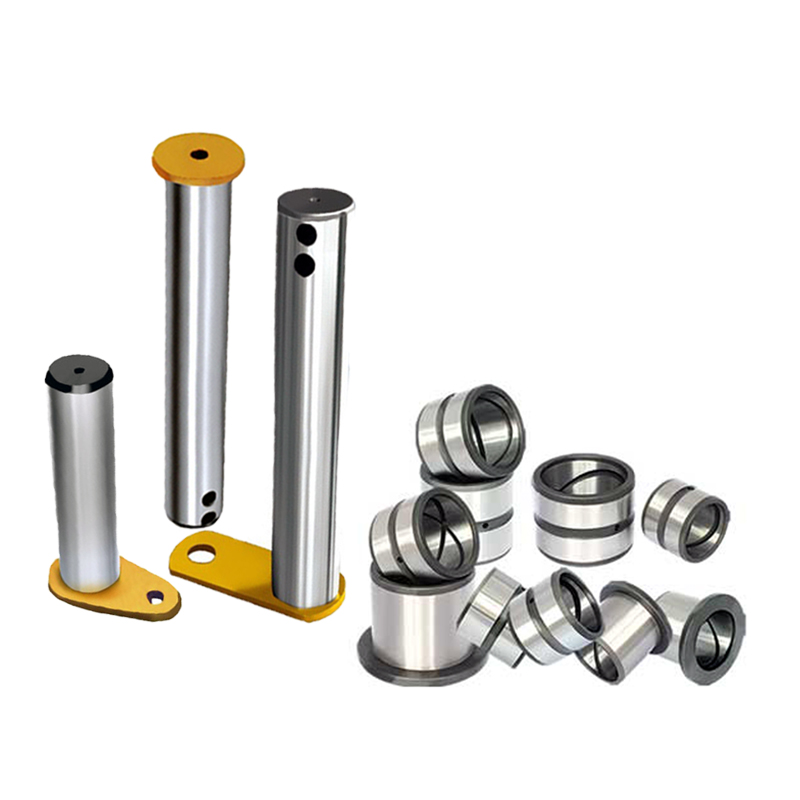
How to replace excavator link pins / boom pins / ram pins
All pins will be secured into their position but the way this is done varies from machine to machine. Takeuchi excavator tend to have a large nut and washer on the end of the pin, Kubota and JCB excavator often have a hole drilled in the end of the pin and a bolt is secured down through it. Other machines have a thread in the end of the pin which a bolt is screwed into. Whatever the type on your excavator this needs to be removed, and then the pin should be able to be removed.
With the pins at the dipper end of the machine, removing them is normally fairly easy but as you get further up the dipper arm and through the boom to the kingpost you need to start to ensure that the arm is well supported before you start to remove the pins.
Often if you are removing the boom to replace the kingpost bushes you will need an overhead crane or a sling on a forklift to assist with removing it and getting it back into position again.
Once the pins are removed it is time to work on the bushes. We always recommend replacing both the pins and the bushes together as both will wear together over time so only replacing one part can often lead to bigger problems.
How to remove
excavator bushes
The first challenge when replacing the bushes in the arm of your excavator is to remove the old bushes.
Typically if you are at the point of removing them, then they are worn out so it doesn't matter what damage you do to the old bushes but you really want to preserve the integrity of the excavator arm at all costs.
We have pulled together a few tips and tricks from plant fitters to help you out!
1) Brute Force! A good old hammer and bar is often enough on smaller excavators especially if the bushes are quite worn out. Be sure to use a bar that is larger than the internal diameter of the bush but smaller than the outside diameter. If you are doing it regularly some engineers find it handy to create a stepped tool for the various sizes of bush.
2) Weld a stub into the bush (even a large blob of weld can work), and this allows you to put a bar through the bush and knock it out
3) Weld around the radius of the bush - this really applies to larger bushes and the idea is that as the weld cools it shrinks the bush enough to allow it to be removed easily
4) Cut the bush out - using an oxyacetylene torch or similar it is possible to cut a slot into the wall of the bush which then allows the bush to shrink and be easily removed. A word of caution on this - it is very easy to go too far and cut into the arm of the excavator and cause expensive damage!
5) Hydraulic Press - probably the safest option but we have put it last in the list, as not everyone has access to the equipment necessary for this.
How to replace excavator bushes
Having removed the old bushes from the arm of your excavator, then next step is to fit replacement bushes.
Again there are various ways of doing this with varying levels of equipment required depending on what equipment you have on hand.
1) Hammer them in! It works sometimes. But be very careful - excavator bushes are normally manufactured from Induction Hardened Steel which although very hard and wear resistant is susceptible to splitting off when you are hammering them.
2) Apply Heat - this works quite effectively if you can get the heat source close enough to where you are replacing the bush. Essentially you need to heat the bush housing as hot as you can which expands it and allows you to push the bush in by hand and let it cool again until it is tight. Just watch the paintwork on the arm of the excavator as the heat can do considerable damage to this.
3) Cool the Bush - effectively this works in the reverse of the above method but rather than heat the housing (which expands it) you cool the bush which contracts it. Typically, trained engineers do this with Liquid Nitrogen which is -195 °C and this requires very specialist equipment and training to use. If it is a small excavator, it is worth putting the bushes into a freezer 24 hours before you try and fit them as often this will cool them enough to make the job a lot easier.
4) Hydraulic Press - again this also requires specialist equipment to do but is a safe and effective way of fitting bushes. It is sometimes used in conjunction with method 2 or 3, especially on larger excavators.
How to replace bushes in a Bucket Link / H Link
Replacing the bushes in the bucket link (also sometimes referred to as an H Link) is really similar to the above methods. One area you have to be careful with is the open end of the bucket link. When pressing the bushes into this end you need to be very careful not to bend this end of the link.
Other pitfalls to watch out for
Worn bush housing
If you have let the old bushes get too worn out, the bush can start to spin in the housing and wear it oval and in this case it is very hard to repair.
Really the only proper way to get this repaired is to get the arm line-bored which requires specialist equipment to weld up the arm and then re-bore it back out.
If you need an emergency solution to get you by, we have seen people add a couple of spots of weld around the outside edge of the bush and then grind them back flush. This is normally enough to hold the bush in place and stop it spinning but it can make life difficult when you when you need to replace them next time.
Hope all thess tips can help you out! any need welcome to mail: nick@peersparts.com.